
Administered by:


A while back, @gwenbeads posted about the book “A Stitch in Line: Mathematics and One-Stitch Sashiko” by Katherine Seaton, and it was so relevant to my interests I had to get hold of it. I’ve been working through it ever since, stitching the samplers and playing with the maths.
I’m currently paused at the end of chapter 8 as I wait for new thread (Retors d’Alsace!!!) to arrive for the next sampler. Here’s a photo of all my samplers so far, done on my hand-dyed muslin scraps; my plan is to patchwork them all together into a hanging once I’ve finished.
Gwen’s review of the book is in a paywalled journal, but she’s put a link to free copies (of the review, not the book) here: https://mathstodon.xyz/@gwenbeads/114094206288896863

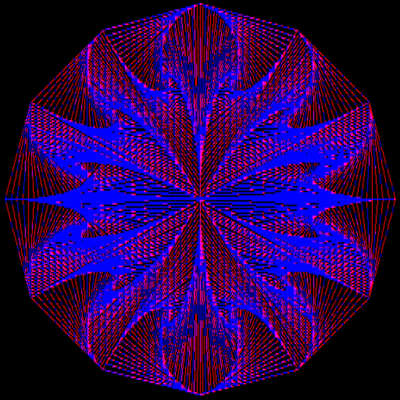
I’m still working my way through *A Stitch In Line* but ended up spending rather a lot of time at the start of chapter 10, which discusses “a remarkable image showing Fibonacci snowflakes emerging in the fully packed loop diagram corresponding to a particular 32 × 32 permutation matrix”: http://www.slabbe.org/blogue/2010/10/fibonacci-tiles-can-appear-in-a-fully-packed-loop-diagram/
I didn’t want to stitch the sampler specified for this chapter because I didn’t think it would fit in well with my plan for making a hanging from all my samplers once I’ve finished the book. So I decided to stitch the “remarkable image” instead, but I wanted to understand it first, and this took me on something of a journey! How does a permutation matrix turn into a loop diagram?
The reference given in *A Stitch In Line* is de Gier J, “Fully packed loop models on finite geometries”, in Guttman AJ (Ed.), *Polygons, Polyominoes and Polycubes*, pp. 317–346, Springer; 2009, which is available at https://arxiv.org/abs/0901.3963 — it took me a while to get my head around it, but I think I got it in the end (and will explain in a separate post because of character limit).
Take a permutation matrix, i.e. a matrix where all entries are either 0 or 1, and each column and row have only a single 1 in them.
Make a square lattice with the same number of points in each row and column as the matrix has. The points are referred to as vertices and the lines between them as bonds.
Draw an arrow on each bond of the lattice so (a) each vertex has 2 arrows pointing toward it and 2 pointing away, (b) the vertices corresponding to non-zero entries in your permutation matrix have their “toward” arrows pointing vertically and their “away” arrows pointing horizontally (see de Gier Fig. 4), and (c) at the boundaries of the lattice, all horizonal arrows point into the lattice and all vertical arrows point away.
Look again at Fig. 4; it should be clear that the arrows across a given row or column of the lattice can only change direction at the points corresponding to non-zero entries in the permutation matrix, so (a)–(c) uniquely determine the arrow placement across the lattice.
Now divide the lattice into “even” and “odd” sublattices so the top left vertex is in the even sublattice, its neighbours are in the odd sublattice, their neighbours are in the even sublattice, etc. So e.g. going along the top row, the vertices will be in the even, odd, even, odd, etc etc sublattices, and along the 2nd row, they’ll be in odd, even, odd, even, etc.
Finally!!! Highlight each bond where the arrow points toward a vertex on the even sublattice. This is your loop diagram.
This construction is known as the “square ice” model, because in statistical mechanics it can be used to model ice (as in normal physical ice, made from water). The vertices correspond to oxygen atoms, each of which is bonded to four hydrogen atoms that lie “within” the bonds of the lattice (and each hydrogen atom is thus bonded to two oxygen atoms). The hydrogen atoms are not positioned symmetrically along the bonds, but are closer to one of their oxygen atoms than the other one; the arrow on each bond of the lattice points to the closest oxygen atom for that bond’s hydrogen atom.
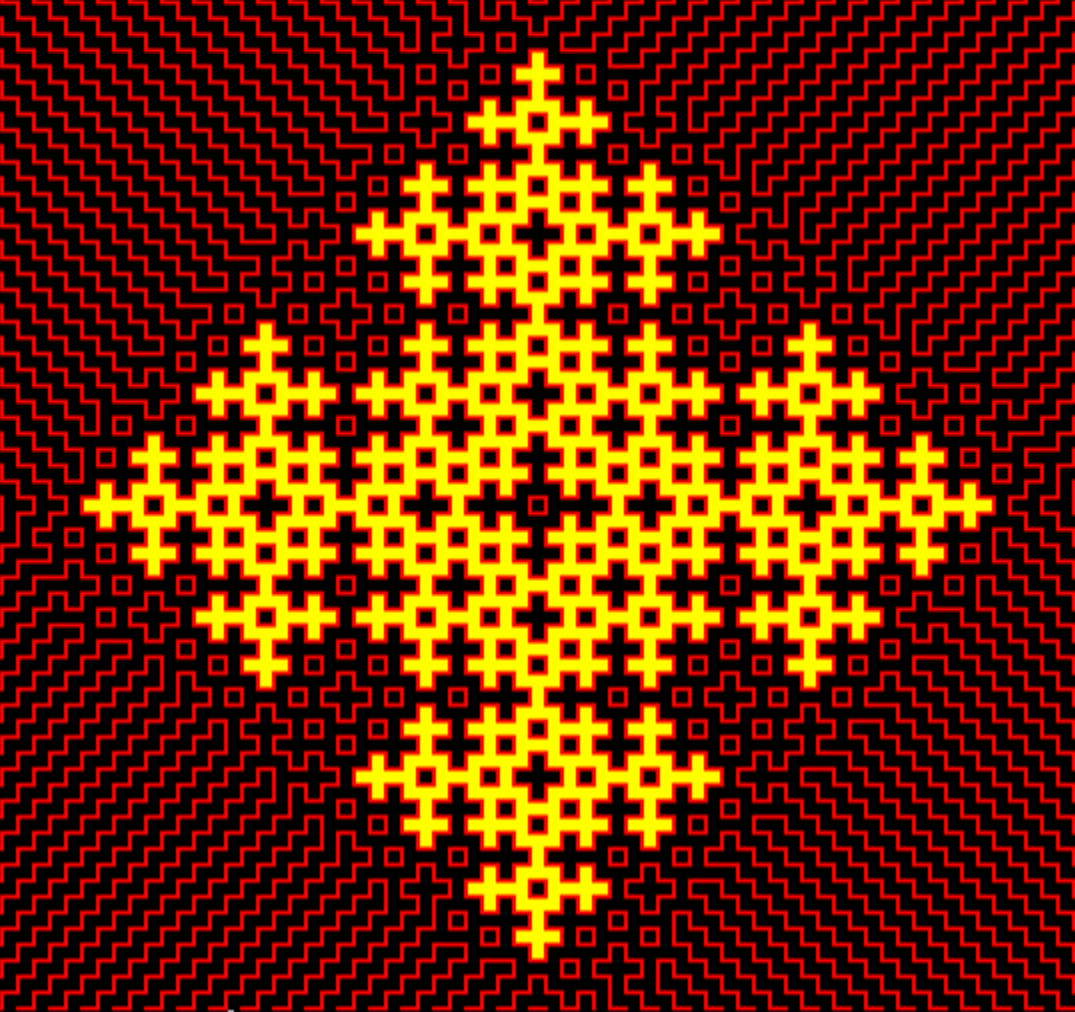
OK, here’s the pretty picture, i.e. the embroidered loop diagram corresponding to the permutation matrix [16, 15, 13, 12, 19, 22, 9, 23, 26, 8, 6, 29, 30, 5, 31, 32, 1, 2, 28, 3, 4, 27, 25, 7, 10, 24, 11, 14, 21, 20, 18, 17]. The small white stitches mark the non-zero matrix entries where the arrows on the lattice change direction and hence the corresponding stitch is twice as long as usual.

Further thoughts on the pretty picture. While I was stitching it, I was wondering if there were any other permutation matrices that would produce Fibonacci snowflakes. There are indeed — after I finished it, I turned it over and there was the order 3 snowflake in the centre. (The photo below is less clear than the front view because of the knots where I had to join thread, but hopefully it’s clear enough.) This corresponds to taking our original permutation matrix “backwards”, i.e. [17, 18, 20, 21, 14, 11, 24, 10, etc].
I like this because it’s a result that’s trivial to see once you’ve stitched it but is not at all obvious from any other way of rendering it (e.g. drawing it on paper or digitally).

@kake
Inspired by your post.
https://mastodon.me.uk/@bbcmicrobot/114569840904150009
@geoffl Oh, very nice! So now we have two ways of making the result obvious :)
I had been pondering writing a renderer in order to make it easier to play around with ideas for finding matrices for the higher-order snowflakes. I have a hunch that the matrices will need to have fourfold symmetry like this one does. I suppose really though the first step should be emailing Sébastien Labbé to find out how they discovered this one.
@kake I'd programned things in BASIC to generate Hitomezashi stitch patterns before and was interested in this variation when I saw you post about it. As it has 4 fold symetry you really only need 1/4 of the probability matrix to genarate it. Unlike the normal matrix where a location only excludes any others in the same row or column this requires each cell chosen in the complete matrix to also have 3 others, as 90° rotations, also selected.
@geoffl Indeed, yes, that’s what I meant by my hunch. However: the snowflakes all have fourfold symmetry but I don’t think it *necessarily* follows that the matrices also have to have it. It might be possible to construct a non-symmetric matrix that has a symmetric snowflake in the middle.
@kake With a bigger grid to stitch across you can have a matrix that has larger offsets on one side than the other without breaking the snowflake (as no points of the probability matrix lay on, or need to lay next to, the boundry of the snowflake) but I can't tell if you can fill the rest of the probability matrix without breaking it. Feels like it should work.
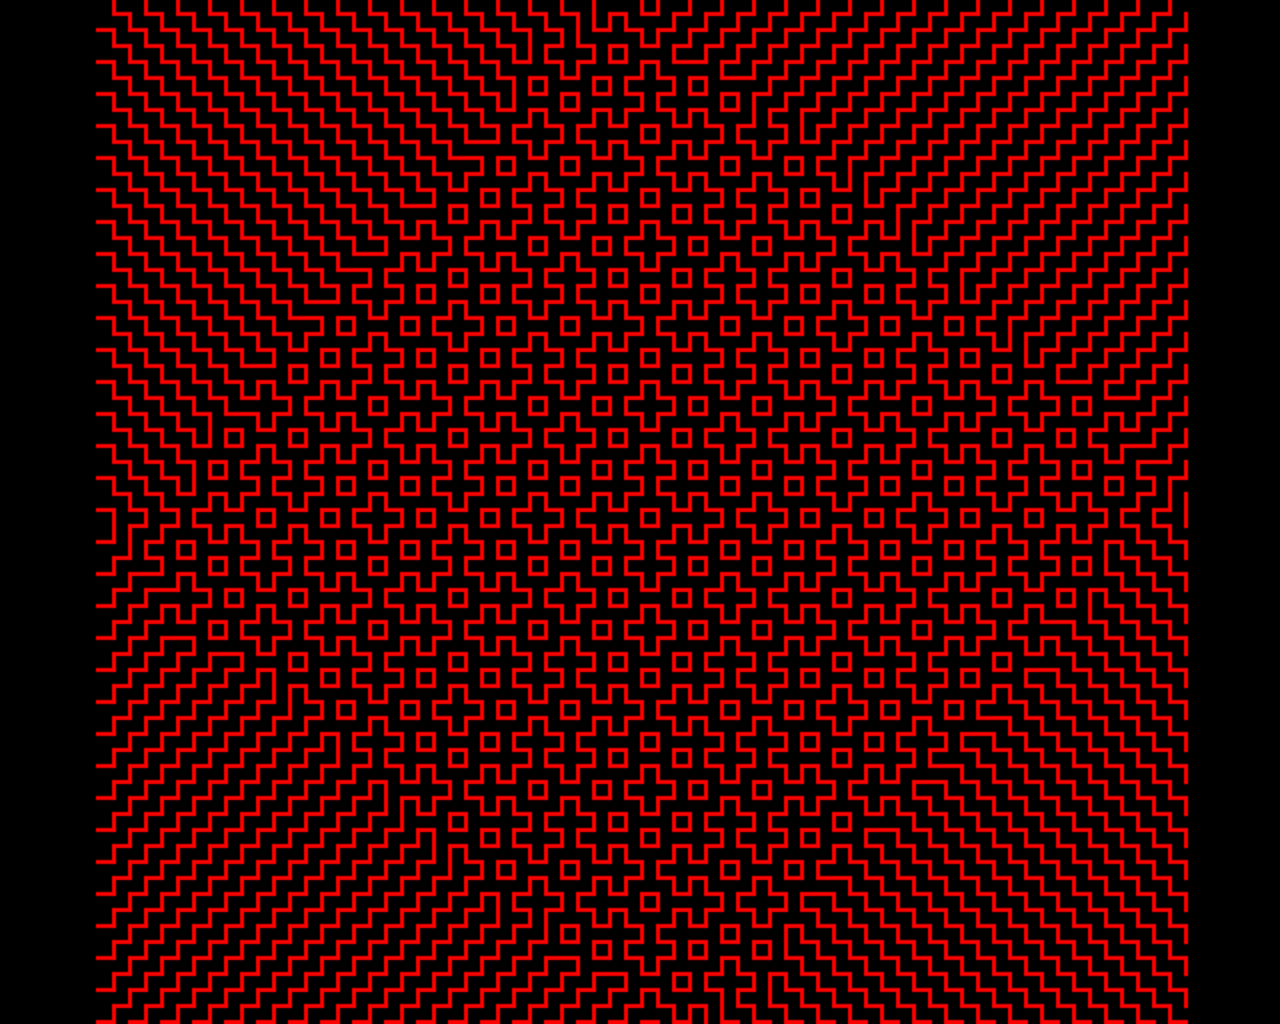
@kake Higher order Fibonacci snowflake.
It's a 4th order snowflake generated using a 68x68 permutation matrix with rotational symmetry.
4th order Fibonacci Snowflake generated from a 68x68 permutation matrix

I ran @geoffl's program and got this.
Source: https://bbcmic.ro/?t=c8aHa #bbcbasic
@geoffl Nice one! How did you work out the right numbers to use in the matrix?
@kake
I'll write up what I did when I'm near a keyboard and I've got time. It's fairly easy. It won't be in proper maths speak or notation though, never did understand that stuff.